
|
JCapper Message Board JCapper 101
|
| Home |
Register
Log In |
| By | Exporting StartersToday data to CSV file | |
| jeff 5/21/2017 5:36:07 AM | From the email inbox: --quote: "Hi Jeff,--end quote Overview On most machines where Excel has been installed - the default Windows File Associations are set so that if you double click a .CSV file it will pop open in Excel. For that reason my first reaction would be: Create a daily .CSV file that contains the specific data fields you want. And from there, bring that file into Excel where you can see the data and work with it. If I were doing this myself - I'd create a stand alone VB program or a VBA function in Excel that would:
That's what I would do. But if I didn't have the ability to create that inside of an hour or two... Until such time as I could create a VB program or a VBA function in Excel to get that done... I would use the following high level strategy to create the same output .CSV file using JCapper: Each Day I would do the following:
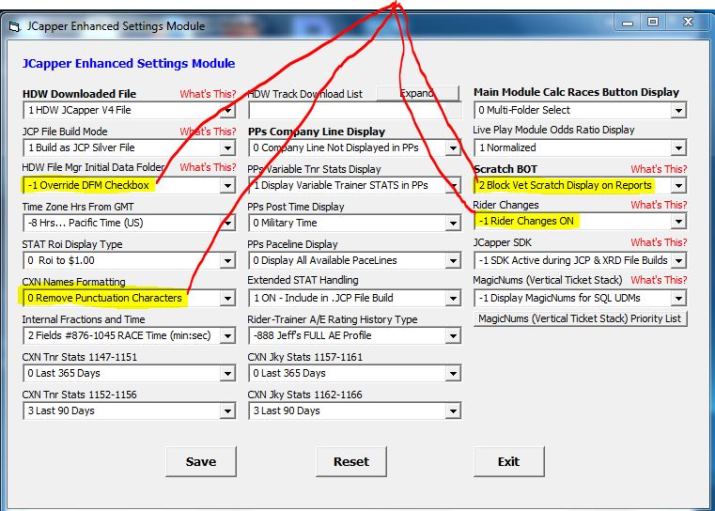
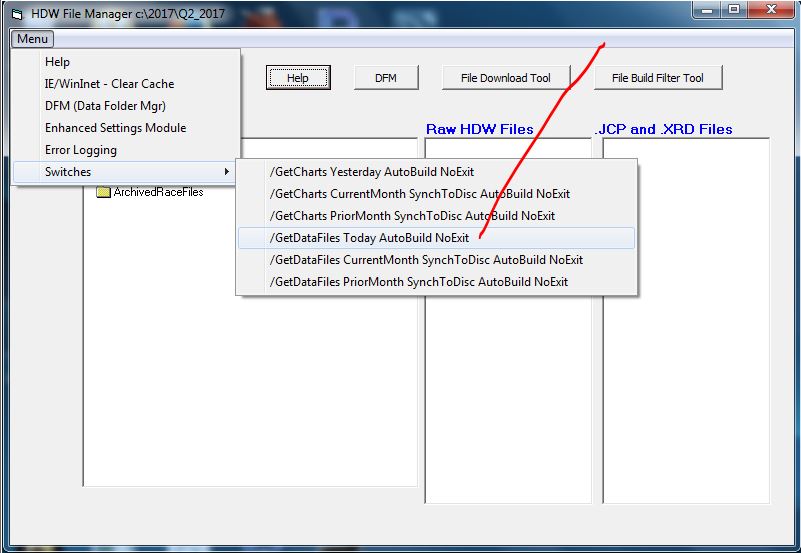
Ok. That's the daily strategy (from a high level.) Now, let's give each of those areas a closer (ground level) look: Download HDW data files Start by going to the JCapper 101 Audio Video Page at the following link: http://www.jcapper.com/podcasts/podcasts.asp Watch the The DFM (Data Folder Manager) - Basic Operating Instructions video in the JCapper BASIC section: http://www.jcapper.com/podcasts/podcasts.asp#V00 You need to know how to use the DFM to control the current active data folder. That's where files downloaded from the HDW site end up. (And it's covered in the video.) Watch the Monthly Downloaders: Downloading Files from the HDW Site (and building comma delimited text .JCP Files) video in the Working with HDW Data section: http://www.jcapper.com/podcasts/podcasts.asp#V08 You need to know how to use the HDW File Download Tool to queue up data files and download them to your current active data folder. (Covered in the video.) You need to know how to use the File Build Filter Tool to run JCP File Build Routines on HDW binary race files downloaded to your current active data folder. (Also covered in the video.) Once you are confident you can do the above without referring back to the videos... Let's Automate the File Download Process a bit:
Now, with the correct settings persisted - and you shouldn't ever have to touch those settings again... From this point forward - each day when it's time to download data files... DOWNLOAD YOUR DATA FILES Using THESE STEPS:
Use the DFM Card Loader to load .JCP files into JCapper. Start by going to the JCapper BASIC section of the JCapper 101 Audio Video page at JCapper.com: http://www.jcapper.com/podcasts/podcasts.asp#V00 Then watch the Loading .JCP Files into JCapper using the DFM Card Loader video. You need to know how to use the DFM Card Loader to load .JCP files into the program on at least data folder one. Better if you understand how to break up your race day using all three folders depending on how many race cards you plan on playing. (But data folder one at a minimum.) Once you are confident you can use the DFM Card Loader without referring back to the video - then it's time to move on to the next step. Use Scratch BOT to get scratches and changes. Start by going to the DAILY REPORTS section of the JCapper 101 Audio Video page at JCapper.com: http://www.jcapper.com/podcasts/podcasts.asp#V05 Then watch the SCRATCH BOT - Parsing Scratches and Changes from the Internet video. You need to know how to click the XML button in Scratch BOT to get current scratches and changes. FYI, the video at the above link is from 2009 and Scratch BOT has been upgraded many times since then. FYI, the most recent versions of JCapper Build 198 (both Silver and Platinum) arrive on your hard drive with a current set of .JCP File compatible entries in the TrackAbbreviations table - enabling you to parse the XML for scratches, races off the turf, and race distance changes for all thoroughbred track codes currently running as I type this (mid May 2017.) And after making the four Enhanced Settings changes (above) you will be equipped to parse and process track condition changes and rider changes from the XML. Meaning that the main thing you really need to know (initially) about operating Scratch BOT is that scratches and changes start showing up about 15 mtp for R1 at most track codes - that scratches and changes are updated in something approaching real time during each race day - and that the easiest way to get current scratches and changes into JCapper is to click the XML Button in Scratch BOT for a given folder prior to running a Calc Races for that folder. FYI, you can also find complete background info in the Processing Changes With the New Scratch Bot on the Help Docs page at JCapper.com - here: http://www.jcapper.com/helpDocs/JCapper_ScratchBot.htm FYI, you can also find complete background info about using Scratch BOT to process Rider Changes in the Rider Changes Help Doc on the Help Docs page at JCapper.com - here: http://www.jcapper.com/helpDocs/RiderChanges.html But, at the end of the day, the main thing you need to know (initially) about operating Scratch BOT is that the easiest way to get current scratches and changes into JCapper is to click the XML Button for a given folder prior to running a Calc Races for that folder. FYI, any time you are operating JCapper on a machine that is not connected to the internet - then you should know how to process scratches and changes manually. For that you want The Manual Changes Module - and to that end (at some point) you should read the Manual Changes Help Doc and you should spend a little time saving some manual changes to make sure you know how. (Both as a backup and when there's a gate scratch and you don't have time to wait for the scratch to be propagated to the XML.) Link to the Processing Changes With the Manual Changes Module Help Doc - here: http://www.jcapper.com/helpDocs/Manual_Changes.htm Once you are confident you can use the XML button in Scratch BOT without referring back to the video - then it's time to move on to the next step. Run a SQL Calc Races Note that I said a SQL Calc Races. JCapper can be operated in two modes: Playlist File Mode and SQL Mode. Playlist File Mode is simpler and easier for the less technically inclined. In Playlist File Mode the UDMs you create involve using the UDM Wizard to select factor names from a drop down... clicking a test box to make that factor active... keying min and max ranges into boxes... and hitting the Save button. SQL Mode is for those who are more technically inclined. And in my opinion SQL Mode is infinitely more powerful than Playlist File Mode. In SQL Mode the UDMs you create are based on SQL Expressions that you create. SQL has been around for a long time and many of you have been exposed to it in school or on the job. I'm in my late 50's right now as I type this. (Believe it or not I was first exposed to the sql programming language my freshman year of college!) SQL isn't terribly difficult so far as programming languages go. (And you really should plan on learning it if you want to get the most out of JCapper.) That said, the first thing you need to know about SQL Mode is where to find the setting for switching back and forth between SQL Mode and Playlist File Mode. FYI, the setting is on the User Sys Defs Screen. To bring up the User Sys Defs Screen: Click System Settings on the face of the JCapper Main Module. Then, on the System Settings Interface: Click System Definitions. To change modes you simply bring up the User Sys Defs Screen, check the box, and hit the Save button. It's really that simple. (But you have to know how.) FYI, The JCapper User System Definitions Screen Help Doc can be found on the Help Docs page at JCapper.com - here: http://www.jcapper.com/helpdocs/UserSysDefsHelpDoc.htm Hint: The checkbox is located in the upper right hand area of the screen and it's clearly shown in the first screenshot at the very top of the help doc. How to run a SQL Calc Races:
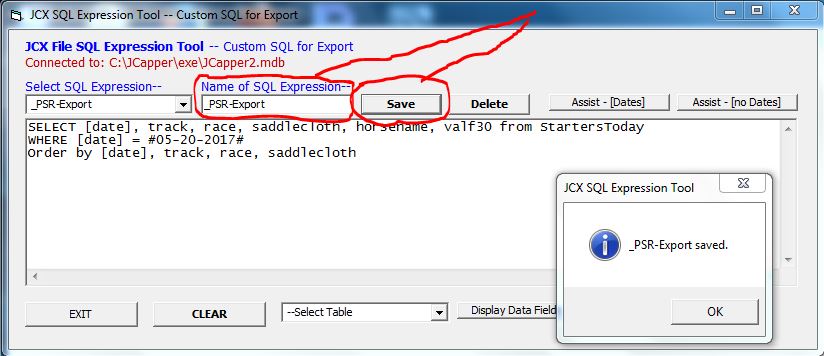
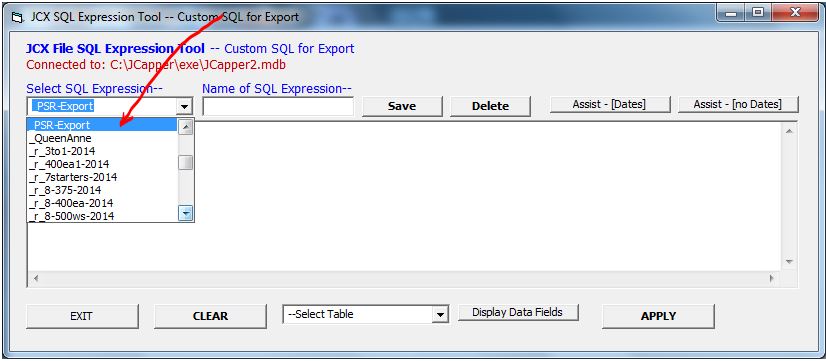
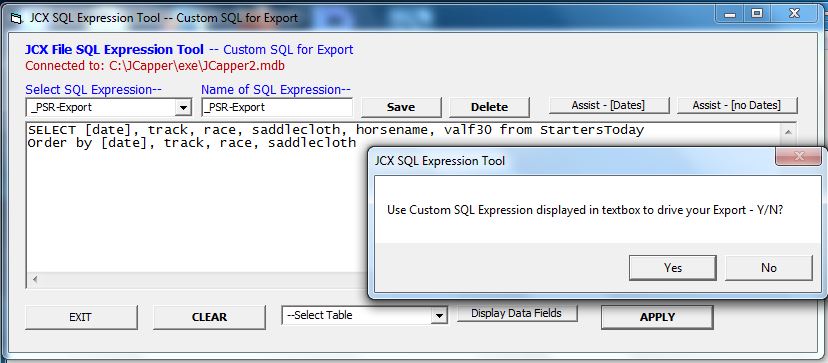
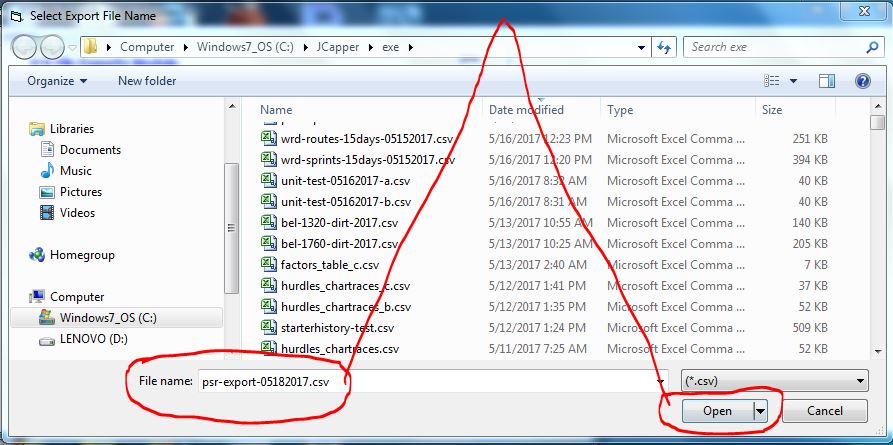
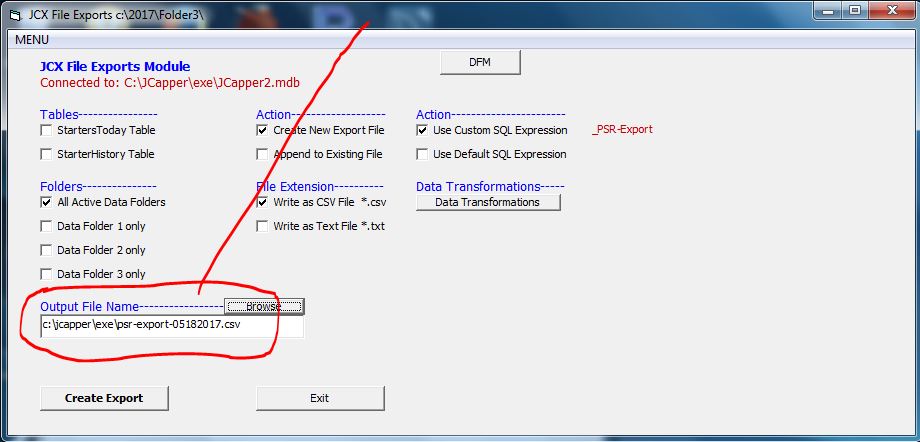
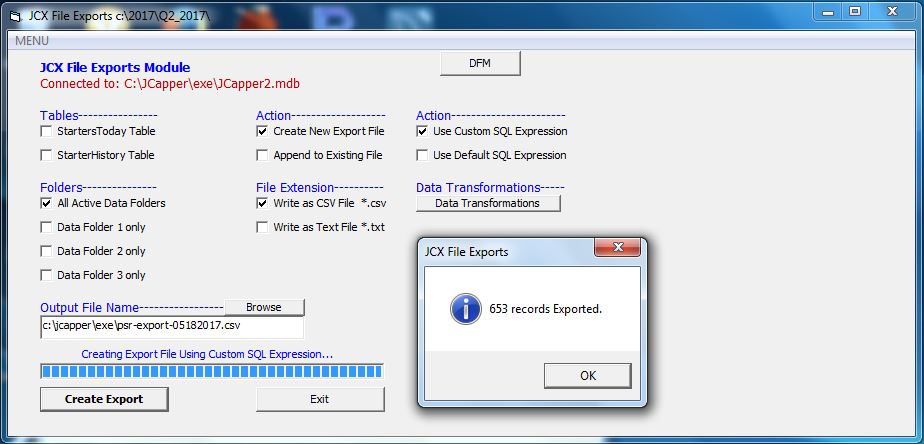
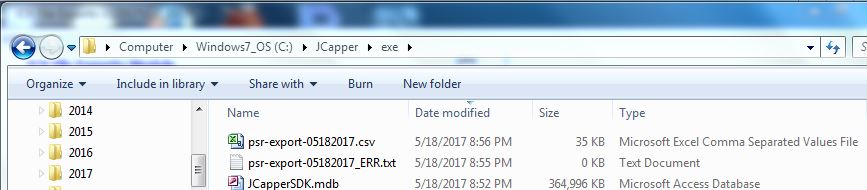
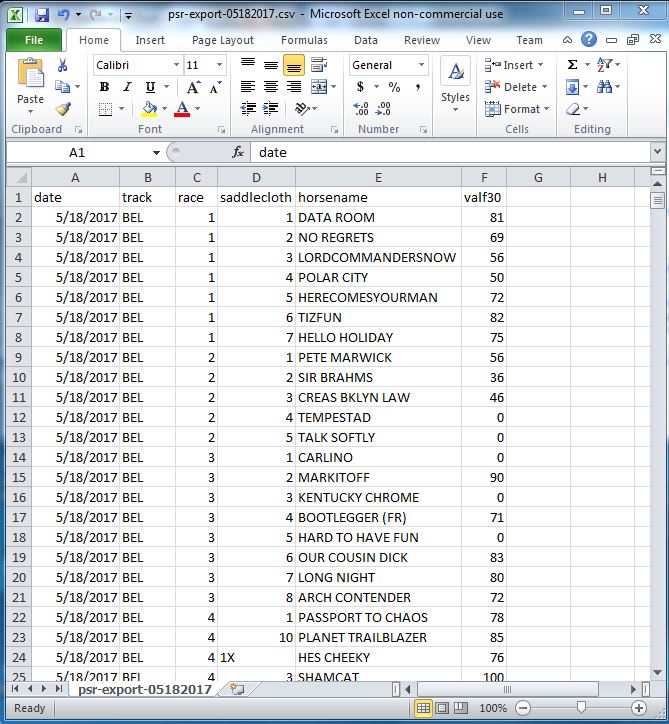
That's it! At this point, if you are operating the program in SQL Mode: The data that you need for your export (for the race cards that you just ran a Calc Races for) is now sitting in the StartersToday table of your c:\JCapper\Exe\JCapper2.mdf file. From here, it's time to move on to the next step. Use the JCX File Exports Module to execute a saved sql expression FYI, not now - but when you have time - you'll want to read The JCX File Exports Module on the Help Docs page at JCapper.com - here: http://www.jcapper.com/helpDocs/JCXFileExportModule.html Understandably there's a lot there to digest. For now I'm just going to provide step by step instructions -- with screenshots -- and a link to a sql expression you can use -- to drive the export you will use to create a .CSV file on your hard drive that will enable you to get PSR plus a handful of other data fields into Excel. BASIC OPERATING INSTRUCTIONS for saving the SQL Expression - and USING IT TO DRIVE YOUR EXPORT and CREATE YOUR DAILY .CSV FILE:
THAT'S IT! At this point you have horse data with PSR sitting in Excel. Repeating the above steps will enable you to create a daily .CSV file that can be opened in Excel. Be aware that you are by no means limited to the column names I used in the above example. The following link will get you a text file that contains field mapping for all of the fields (or column names) in the StartersToday table: StartersToday_FieldMap_SILVER.txt -jp . ~Edited by: jeff on: 5/21/2017 at: 5:36:07 AM~
| |
| jeff 3/11/2019 7:35:04 PM | Thread bumped per email request 03-11-2019. -jp .
|

| Reply |
|
Copyright © 2018 JCapper Software back to the JCapper Message Board www.JCapper.com |